Introduction
This guide will show you how to install a Linux email server. After completion, you'll have the following capabilities:
- Retrieve email from a remote POP account and deliver it to a local user
- Access your email locally, through webmail or Outlook/Thunderbird
- Access your email remotely, through webmail, while on the road (if you choose to)
- Website hosted by an outside service
- POP email accounts hosted by the same outside service
- High-speed Internet connection
- An Internet router/firewall device
For this tutorial, we're going on the assumption that your company is called Example. Your website is called Example.com. And, one of your email addresses is sales@example.com. All this is hosted by XYZ company, whose website is xyz.com.
Here's the software we're going to install.
I've chosen this configuration for two reasons. One, they are both available free of charge. Second, they can both be upgraded to a paid-for version for the purpose of support.
CentOS is a clone of Red Hat Enterprise Linux. Upgrading from CentOS to RHEL is rather smooth, and would be done for the purpose of having paid support. Scalix offers the Community Edition free of charge. You'll have unlimited webmail users, and 10 premium users (that is, 10 users able to connect to Scalix with Outlook). They also have a paid-for network edition. Upgrading is smooth as well.
So you can start off by not shelling out one dime to get a working setup for testing and deployment. And, you can upgrade to paid-for support at any time. Now that's sweet!!
I'll also mention that Scalix is a Xandros company. Xandros produces Linux. (Xandros is based on Debian. I prefer Debian over Red Hat. Well, at least I prefer apt over yum, and Synaptic over YumEx, but that's grounds for a flame war!) That would lead me to believe that Xandros would be better than CentOS for installing Scalix. And that may be. But CentOS has proven to be a reliable distro to run Scalix. CentOS is directly based on RHEL. Right now, I have a server in place that hasn't been rebooting in over 260 days. Feel free to draw your own conclusion.
What You'll Need
Scalix recommends a RAID 1+0 configuration, as it is heavy on the disk I/O. I use RAID 1. I gain redundancy, but I loose speed because I'm not using RAID 0. The only loss of speed is with the webmail interface. If a user has hundreds of emails in one folder, accessing them could be a bit of a pain. But if things are kept fairly tidy, you won't notice a thing. Outlook connects fine. So does Thunderbird through IMAP. Also, my entire first disk is mirrored to the second disk, including swap. This way, if one disk completely dies, I'm still up and running.
- A late model computer (somewhere in the 2+ Gigahertz range)
- At least 1 Gigabyte of RAM
- 2 identical hard drives (for a RAID 1 setup, more for RAID 1+0)
- CentOS installation media, downloadable from here
Installing CentOS
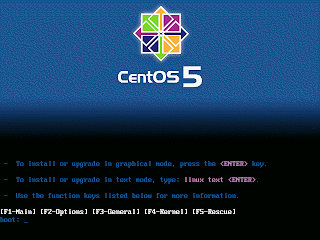
Insert installation media in the CD/DVD drive and boot the computer. Press 'Enter' to boot the system
Insert installation media in the CD/DVD drive and boot the computer. Press 'Enter' to boot the system
This screen presents you with the option to test your media. Typically, one should test the ISO image downloaded before you burn it to disk to insure the download didn't get mangled. This check eliminates the possibility of a bad burn. It's highly recommended you do this test, and not skip it.
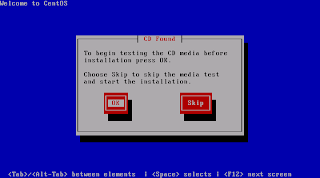
This screen presents you with the option to test your media. Typically, one should test the ISO image downloaded before you burn it to disk to insure the download didn't get mangled. This check eliminates the possibility of a bad burn. It's highly recommended you do this test, and not skip it.
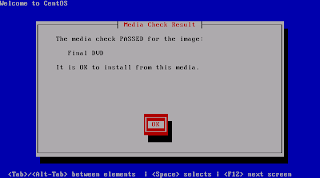
I love it when this happens! Press OK, and on the next screen press Continue.
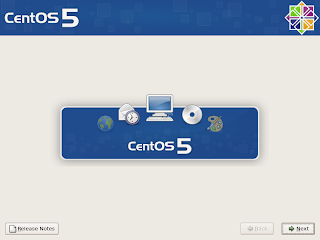
This is self-explanatory. Click Next
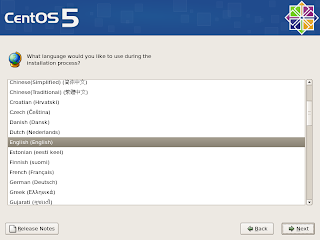
Select your language.
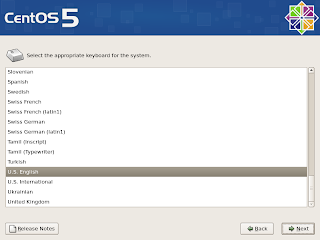
Select your keyboard
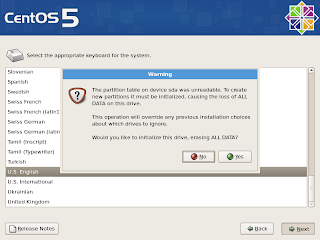
This warning only shows up if you are using a new disk, or a disk without a partition table. Click on Yes.
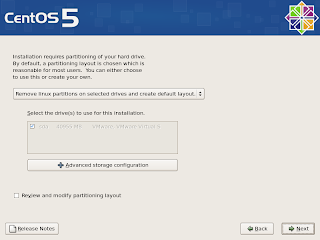
For this tutorial, I'm going with the default layout. This will give you an LVM setup, with everything thrown in one partition. Click Next. Another window will open warning that all data will be destroyed. Click Yes. (If you choose something different, help yourself!)
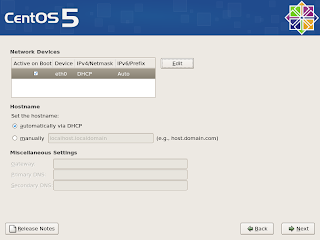
Now it's time to configure the network.
- Click on Edit under Network Devices.
- Click on Manual configuration under Enable IPv4 support
- Enter your IP address (192.168.1.2)
- Enter your Netmask (255.255.255.0)
- Uncheck IPv6 support.
- Click OK
- Enter server.local.zzz in the hostname area (next to manually)
- Enter your Gateway address (probably 192.168.1.1)
- Enter your Primary DNS server (probably 192.168.1.1)
Item 7 matches the host.domain.tld convention
Items 8 and 9 should be the address of your router
Click Next
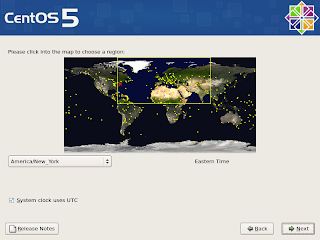
Select your timezone. And select whether your hardware clock uses UTC. If the time on your hardware clock is set to local time, uncheck it.
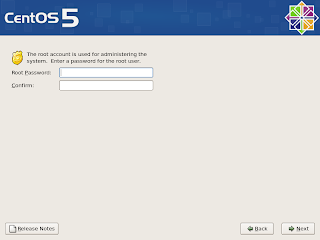
Select a password for the root account. This is equivalent to Administrator for that 'other' operating system.
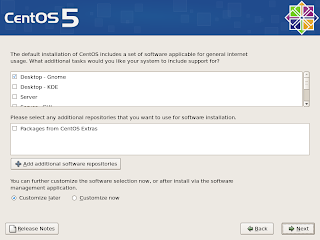
Here you can select additional packages. Let's just go with the default of Desktop - Gnome. Click Next.
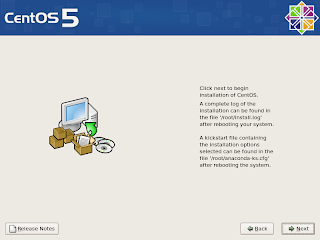
OK, let her rip! Click Next to install.
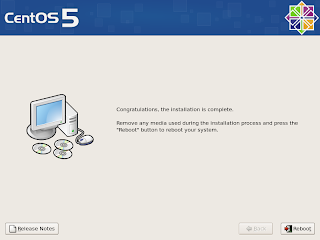
OK, now we're done. Let's reboot!
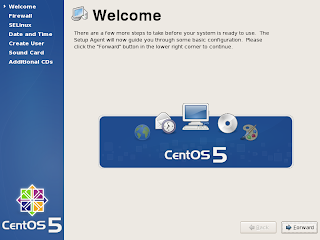
Welcome to the first time boot screen. Just click next
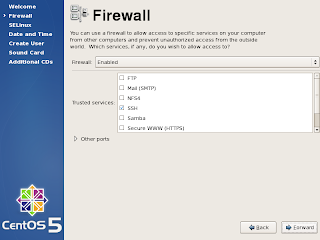
Let's turn off the firewall. Why? Because our router has a firewall on it. And, if we are going to configure a firewall, we'll just use iptables to do it. So change Enabled to Disabled and click Forward. The installer will give you a warning. Just tell it Yes.
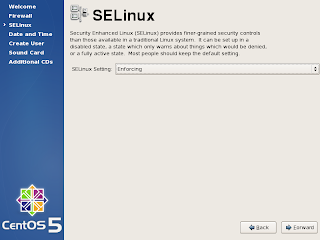
SELinux, or Security Enabled Linux adds to the security of Linux. It also adds complexity, and makes debugging your installation more difficult. Should you decide to use it, don't turn it on until after you have a working setup. Set it to Disabled and click Forward. It will warn you that you'll have to reboot. That's OK. It's one of the few times you'll have to do it!
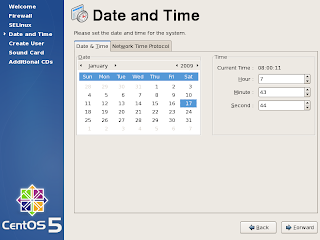
Configure your time.
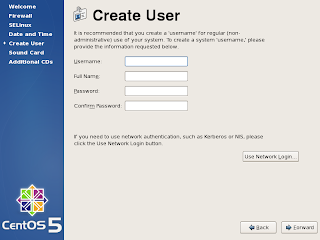 Add a user. Our username for the tutorial is user.
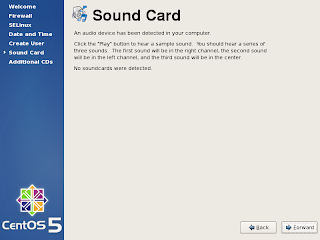
You can test your sound card, if one is detected. I don't have one, so I'll move past this.
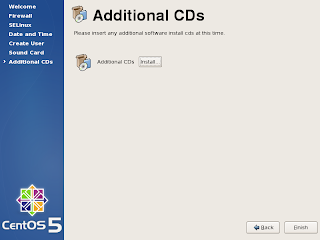
If you have additional CD's with software packages on them, you can install them here. Since we don't, let's click Finish and continue with a reboot (because we changed SELinux).
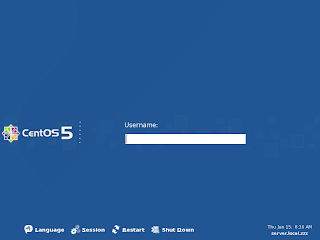
Let's login.
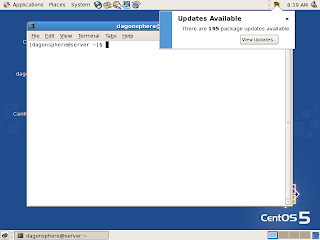
Yep, it's Gnome. Right click on the desktop, and select Terminal. First off, we need to update the system. Even though the GUI is telling us that there are updates for the system, we'll use the command line to do the update. In the terminal, do the following.
- su - root
- Enter your root password
- yum upgrade -y
Install DNS
Now that the updates are done (however long that took), it's time to install the DNS server that Scalix needs. In the same terminal window (login in as root), do
- yum install -y bind caching-nameserver
/etc/hosts -- Edit this file
# Do not remove the following line, or various programs
# that require network functionality will fail.
127.0.0.1       localhost.localdomain   localhost
192.168.1.2     server.local.zzz server
The last line should use your IP address, and your FQDN and hostname.
/etc/resolv.conf -- Edit this file
search local.zzz
nameserver 192.168.1.2
/etc/named.conf -- Create this file
include "/etc/rndc.key";
zone "local.zzz" {
type master;
file "/etc/named.zzz.fwd";
allow-update { key "rndckey"; };
notify yes;
};

zone "1.168.192.in-addr.arpa" {
type master;
file "/etc/named.zzz.rev";
allow-update { key "rndckey"; };
notify yes;
};

options {
forwarders { 192.168.1.1; } ;
};
/etc/named.zzz.fwd -- Create this file
$TTL 14400;
@ 14400 IN SOA server.local.zzz. root@local.zzz. (
2009011501 ; Serial in YYYYMMDDXX- tab indented
28800 ; Refresh
3600 ; Retry
604800 ; Expire
14400 ; Default TTL
)
@ IN NS server.local.zzz. ;
@ IN A 192.168.1.2
@ IN MX 10 server.local.zzz.
server IN A 192.168.1.2
scalix-default-mail IN A 192.168.1.2
/etc/named.zzz.rev -- Create this file
$TTL 14400;
@ IN SOA server.local.zzz. root.local.zzz. (
2009011501 ; Serial
28800 ; Refresh
3600 ; Retry
604800 ; Expire
38400 ; Default TTL
)
IN NS server.local.zzz. ;tab intented
2 IN PTR server.local.zzz. ;
2 IN PTR scalix-default-mail.local.zzz.
And, now for security, in a terminal as root, enter
- chmod 640 /etc/named.zzz*
- chmod 644 /etc/named.conf
- service named start
- chkconfig --level 2345 named on
A few things to remember. Be sure to enter your own info in the config files. This is just a sample you can modify for yourself. And, if you modify the forward or reverse zone files, you need to index the serial number. I chose a serial number of year, month, day, version. 2008011501. You can index numbers starting from 1. But with my format, it's easier to tell if you've actually changed the serial number.
Install Scalix
Now, it's on to install Scalix. First, we need to install a few packages before we do that. Once again, in a terminal, as root, enter:
- yum install -y tk cyrus-sasl-md5 cyrus-sasl-plain sendmail-cf postgresql-server postgresql-libs mx compat-libstdc++-296
- cd /home/user/Desktop
- chmod 755 scalix-11.4.3-GA-community-rhel5-intel.bin (or whatever the download name is)
- ./scalix-11.4.3-GA-community-rhel5-intel.bin
The archive gets extracted, and you're presented with a readme. Read through it, and when asked if ou want to run the package that was extrated, say yes. The file executed it is ~/Desktop/scalix-11.4.3-GA/scalix-installer.
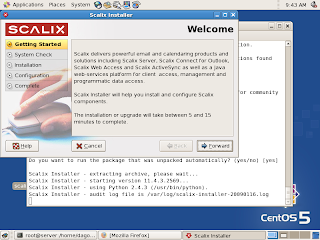
Here's the Welcome screen to the installer. Not much to do here except cancel, or go forward.
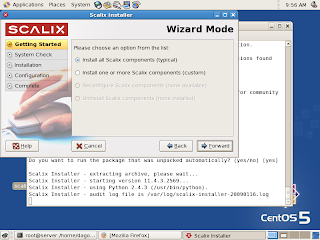
You now have two options. Install all Scalix components, or only some of them. Click forward to install ALL components.
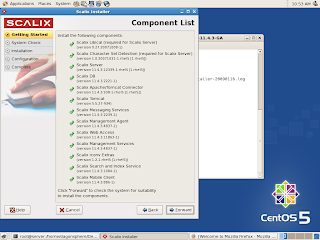
After a short while (and a change in my screen resolution), the installer will now search for available packages to install. You should have green checkmarks next to 13 components. Click Forward.
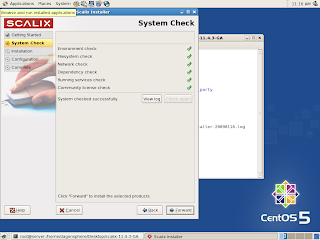
The installer will now verify the installation environment. All should be well. Click on forward.
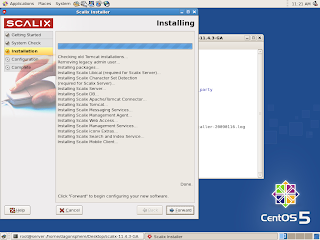
Everything is installed. Now it's time to configure.
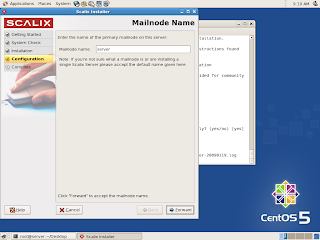
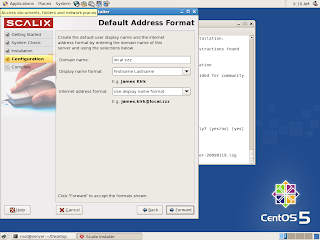
Default Address Format - Add your domain name here. local.zzz. You can change the default display if you like.
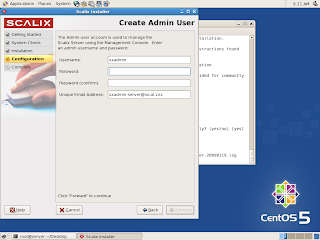
Create Admin User - sxadmin is the default administrator for the email system. Enter a password. After this, it will take a few minutes to create the message store
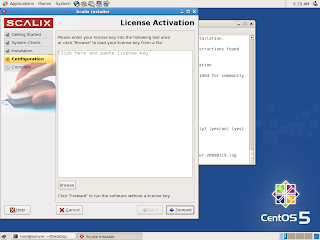
License Activation - Only required if you purchased Scalix. Just click Forward. A warning will pop up telling you the license key was not entered correctly. Just click OK.
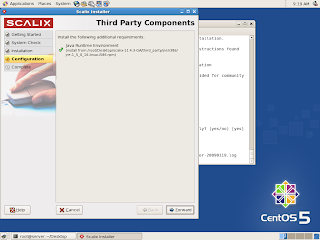
Third Party Components. Click Forward to install Java
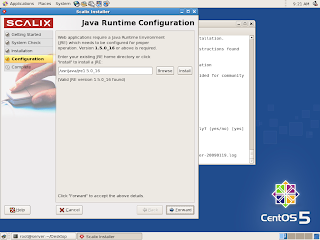
Java Runtime Configuration - Accept the defaults my clicking Forward.
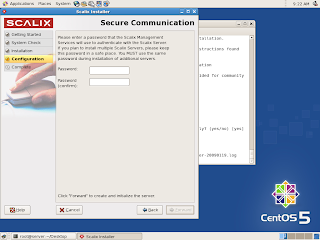
Secure Communication - This is the password needed for Scalix components to talk to each other. Enter a password, and click Forward
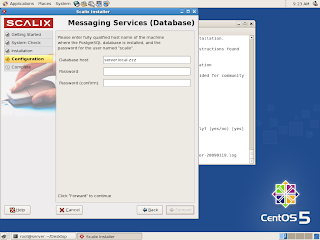
Messaging Services (Database) - Enter a password for the PostgreSQL database.
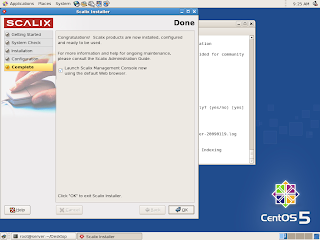
In case this browser fails to open (as it has done to me in the past) open your browser and go to http://server/sac. You'll probably have to allow pop-ups, and refresh the page. Use the sxadmin username and the proper password. You'll also have to click on the "Not using a secure https connection" box. You can add and manage your system here.
Webmail can be accessed by pointing your browswer to http://server/webmail. Again, after you login, a popup window will apear with the webmail interface.
If you use Outlook, you'll have to download and install the connector on each Windows machine.
Getting Your Email
/home/user/.fetchmailrc -- Create this file
poll pop.example.com proto pop3
user sales@example.com there with password secretpassword is user sales@example.com here
*/5 * * * * fetchmail -a
This cron file will check for new email every 5 minutes.
Backups
Backing up the server is easy. Here's a little script I use to back things up with:
scalix-backup -- create this file and give it execution permissions
#!/bin/bash

dest=/media/disk/
tmpath=/files/

if [ `date +%a` = "Sun" ] ; then

file=scalix-week-`date +%V`.tar
else

file=scalix-`date +%u-%a`.tar

fi

/opt/scalix/bin/omshut

tar cfP $tmpath$file /var/opt/scalix/*
tar rfP $tmpath$file /opt/scalix
tar rfP $tmpath$file /opt/scalix-chardet
tar rfP $tmpath$file /opt/scalix-libical
tar rfP $tmpath$file /opt/scalix-postgres
tar rfP $tmpath$file /opt/scalix-tomcat

/opt/scalix/bin/omrc

bzip2 -9 $tmpath$file
rm $dest$file.bz2
cp $tmpath$file.bz2 $dest$file.bz2
rm $tmpath$file.bz2
Recovery
scalix-recover -- Create this file and give it execution permissions
#!/bin/bash

/opt/scalix/bin/omshut
rm -R /var/opt/scalix /opt/scalix*

tar xvfjP scalix.tar.bz2
/opt/scalix/bin/omrc
Access Mail Remotely
There's a few things you'll need to access the Scalix webmail interface remotely.
Assuming you have a dynamic IP address, you'll need
/var/www/html/index.html -- Create this file
XXX = the number of seconds before the page is redirected. xx.yy.zzz is the hostname you configured with DynDNS.
Assuming you have a dynamic IP address, you'll need
- A DynDNS account (or similar)
- A router that can be programmed with DynDNS information
- To program the router to forward TCP port 80 to the Scalix server
- To open port 80 in the firewall (if any) on the Scalix server
/var/www/html/index.html -- Create this file
<html>
<head>
<meta equiv="refresh" content="XXX; URL=http://xx.yy.zzz/webmail">
</html>
</head>
XXX = the number of seconds before the page is redirected. xx.yy.zzz is the hostname you configured with DynDNS.
That's it! Enjoy your Scalix 11.4.3 installation on CentOS 5!
15 comments:
Thanks for the guide. I am on my way to install cent os and scalix. Is the dns part already corrected?
I have not had a chance to review the DNS portion. I was going to rewrite the post to use bind9 instead of bind. Since my internal DNS server is not visible to the outside world, updating the post was not high on my list of priorities - as this config works and suits my needs.
All my local workstations use the DNS server on the Scalix box for resolving IP's. The Scalix box resolves IP's. Fetchmail works. And everyone here is happy!
Keep me posted on your progress.
Very good tutorial
and how to working with OpenLDAP?
Ley,
Send me an email and let's talk about OpenLDAP
Yes good tutorial, got me up and running in no time.
But I need some help now setting up an authenticated smarthost... any ideas?
My ISP does not require this, so I haven't had to set this up.
After a quick Google, I found these
http://www.go2linux.org/smart-host-sendmail-exim
http://www.linuxquestions.org/questions/linux-server-73/sendmail.mc-entry-for-smart-host-on-different-port-690852/
HTH!
Thanks for the help with SmartHost... I have it working now!
PS: anyone trying this will ALSO have to add ALL email addresses you will be sending FROM to your AT&T list of verified outgoing email addresses! See: http://help.yahoo.com/sbc/dsl/mail/pop/pop-11.html
for help.
Hi there, I have followed your guide, but when i run the fetchmailrc it gets the mail, but puts it into the sendmail root mailbox. Any ideas? I think it might have something to do with sendmail not passing or forwarding the mail onto the scalix server?
Marc - Could you post your .fetchmailrc? Just "X" out your password.
Good Morning,
I actually found out a way to work around this. the error message i kept getting had to do with the envelope option not set, so i played around with the fetchmailrc file, and came up with this:
poll pop.mydomain.co.za proto pop3
user "user@mydomain.co.za" password "xxxxxx" is user@mylocaldomain keep
Nice post..
I setup my test machine and go thur all the hurdle b4 i found this post.
Regarding to the dns part, i just modify the hosts file add my local machine ip, 192.168.0.9 mail.example.com mail and it works for me. The resolv.conf is pointing to the firewall (smoothwall express) -> isp dns server.
But i do have question..how can i copy all user mailboxes from scalix 11.2 to new server scalix 11.4?
Once more, nice article.
Wilson
If the new 11.4 is the same hostname/ip address as the 11.2, you should just be able to copy /var/opt/scalix/ to the new server.
I haven't had to move a mail store from 'server1' to 'server2', so I'm not sure exactly how to do that besides using an email client and doing it the tedious way. That's how I ended up moving 3 gigs and 7 email boxes from Exchange to Scalix! (the Exchange database was corrupt, wouldn't compact, and wouldn't backup, so I was gun-shy about anything automatic)
I seem to remember seeing a post on the forms about using a script, but I'll have to see if I can find it again.
Thanks Dr Rock
How about if they are in the same box?
I backup /var/opt/scalix to a nas. Download 11.4 and just run install and it will upgrade my 11.2 to 11.4?
Also, i was trying to install mailscanner on my box but doesn't seems it is working.
Wilson -
Yes, running the 11.4 install on top of an existing 11.2 server will upgrade to 11.4. I have successfully done just that, upgrading from 11.3.0 to 11.4.3.
Regarding Mailscanner, it looks like Scalix doesn't officially support that.
http://www.scalix.com/forums/viewtopic.php?p=7614
Though there have been some users that set it up successfully.
I've yet to customize Scalix to that point. I rely on the email host to take care of spam, although that does leave something to be desired!
--DRH
MailScanner, while not supported by Scalix, works a treat, the only thing you need to do is to add SMTPFILTER=TRUE to your smtpd.cfg file in /var/opt//s/sys directory, where is equal to the first and last letters of your server name e.g. ml of mail.
Post a Comment