Introduction
This guide will show you how to install a Linux email server. After completion, you'll have the following capabilities:
- Retrieve email from a remote POP account and deliver it to a local user
- Access your email locally, through webmail or an email client
- Access your email remotely, through webmail, while on the road (if you choose to)
- Website hosted by an outside service
- POP email accounts hosted by the same outside service
- High-speed Internet connection
- An Internet router/firewall device
Because this server is geared towards a small (and possibly medium) sized business, I do not want that business to host the website and the email. Why? The website for a business has to be up 24/7/365 with 99.99% uptime. A small business (in my opinion) can neither afford the infrastructure to maintain such a system, nor can they afford to hire talented personnel to maintain it. And even with all that hardware and expertise, all it takes is a power failure to last longer than your battery backups, and you're down.
For this tutorial, we're going on the assumption that your company is called Example. Your website is called Example.com. And, one of your email addresses is sales@example.com. All this is hosted by XYZ company, whose website is xyz.com.
Here's the software we're going to install.
I've chosen this configuration for two reasons. One, they are both available free of charge. Second, they can both be upgraded to a paid-for version for the purpose of support.
CentOS is a clone of Red Hat Enterprise Linux. Upgrading from CentOS to RHEL is rather smooth, and would be done for the purpose of having paid support. Zimbra offers the Open Source Edition free of charge.
So you can start off by not shelling out one dime to get a working setup for testing and deployment. And, you can upgrade to paid-for support at any time. Now that's sweet!!
Caveat
There is one thing to be aware of with this installation. We have to disable sendmail in order to install Zimbra, as Zimbra has its own MTA. You can remove sendmail, provided that you are not using software RAID. For reason, mdadm is dependant on sendmail.
What You'll Need
The following system requirements were taken from the System Requirements link found on the Zimbra Documentation page.
- A late model computer (2+ Gigahertz)
- At least 2 Gigabytes of RAM
- 10 Gigs of hard drive space for software and install logs
- Ample storage space for mailboxes and other user data
- CentOS installation media, downloadable from here
Installing CentOS
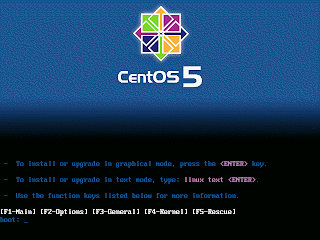
Insert installation media in the CD/DVD drive and boot the computer. Press 'Enter' to boot the system
Insert installation media in the CD/DVD drive and boot the computer. Press 'Enter' to boot the system
This screen presents you with the option to test your media. Typically, one should test the ISO image downloaded before you burn it to disk to insure the download didn't get mangled. This check eliminates the possibility of a bad burn. It's highly recommended you do this test, and not skip it.
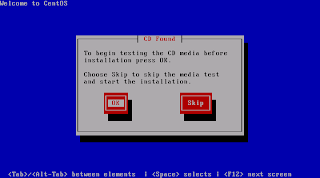
This screen presents you with the option to test your media. Typically, one should test the ISO image downloaded before you burn it to disk to insure the download didn't get mangled. This check eliminates the possibility of a bad burn. It's highly recommended you do this test, and not skip it.
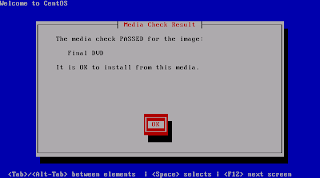
I love it when this happens! Press OK, and on the next screen press Continue.
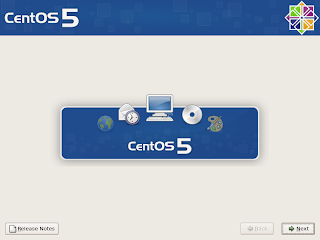
This is self-explanatory. Click Next
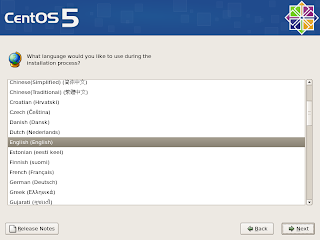
Select your language.
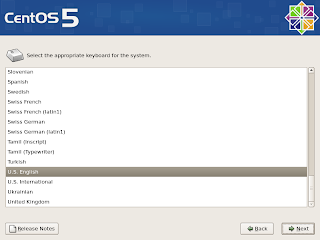
Select your keyboard
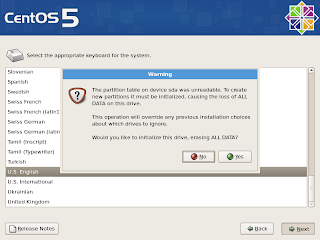
This warning only shows up if you are using a new disk, or a disk without a partition table. Click on Yes.
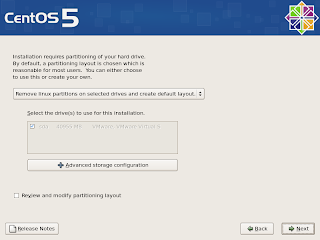
For this tutorial, I'm going with the default layout. This will give you an LVM setup, with everything thrown in one partition. Click Next. Another window will open warning that all data will be destroyed. Click Yes. (If you choose something different, help yourself!)
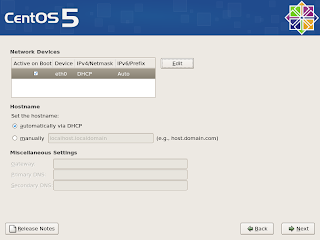
Now it's time to configure the network.
- Click on Edit under Network Devices.
- Click on Manual configuration under Enable IPv4 support
- Enter your IP address (192.168.1.2)
- Enter your Netmask (255.255.255.0)
- Uncheck IPv6 support.
- Click OK
- Enter server.local.zzz in the hostname area (next to manually)
- Enter your Gateway address (probably 192.168.1.1)
- Enter your Primary DNS server (probably 192.168.1.1)
Item 7 matches the host.domain.tld convention
Items 8 and 9 should be the address of your router
Click Next
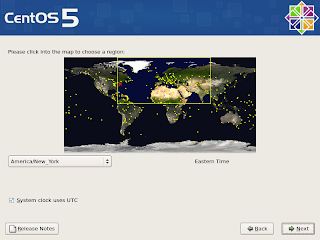
Select your timezone. And select whether your hardware clock uses UTC. If the time on your hardware clock is set to local time, uncheck it.
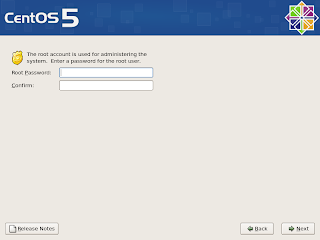
Select a password for the root account. This is equivalent to Administrator for that 'other' operating system.
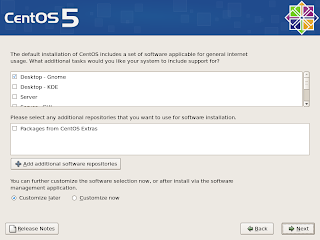
Here you can select additional packages. Let's just go with the default of Desktop - Gnome. Click Next.
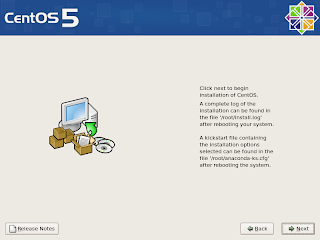
OK, let her rip! Click Next to install.
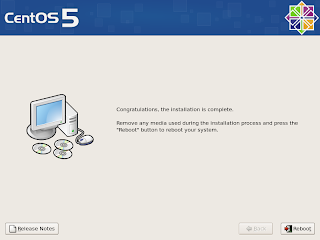
OK, now we're done. Let's reboot!
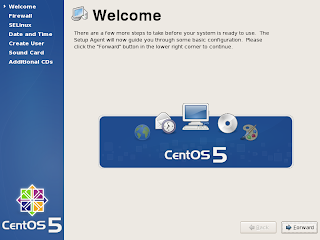
Welcome to the first time boot screen. Just click next
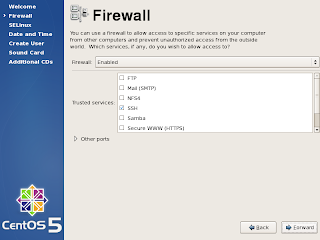
Let's turn off the firewall. Why? Because our router has a firewall on it. And, if we are going to configure a firewall, we'll just use iptables to do it. So change Enabled to Disabled and click Forward. The installer will give you a warning. Just tell it Yes.
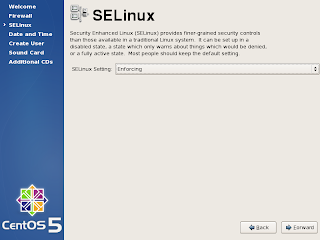
SELinux, or Security Enabled Linux adds to the security of Linux. It also adds complexity, and makes debugging your installation more difficult. Should you decide to use it, don't turn it on until after you have a working setup. Set it to Disabled and click Forward. It will warn you that you'll have to reboot. That's OK. It's one of the few times you'll have to do it!
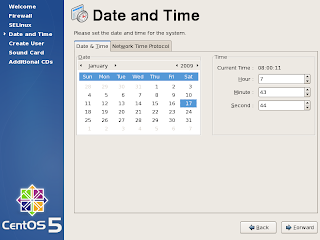
Configure your time.
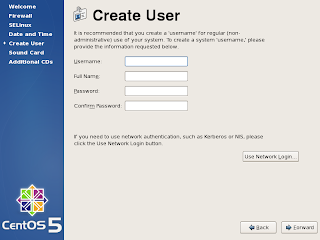 Add a user. Our username for the tutorial is user.
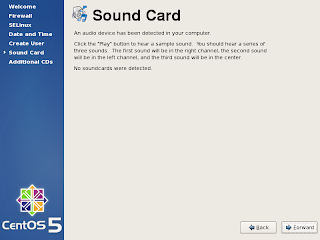
You can test your sound card, if one is detected. I don't have one, so I'll move past this.
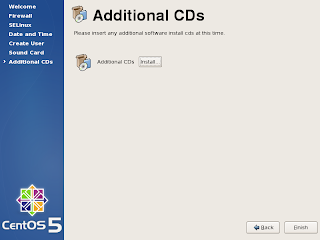
If you have additional CD's with software packages on them, you can install them here. Since we don't, let's click Finish and continue with a reboot (because we changed SELinux).
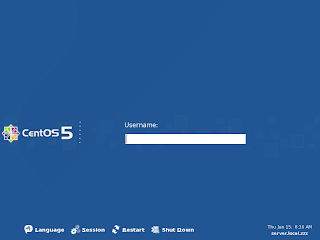
Let's login.
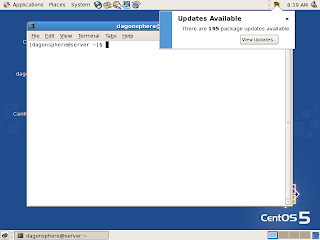
Yep, it's Gnome. Right click on the desktop, and select Terminal. First off, we need to update the system. Even though the GUI is telling us that there are updates for the system, we'll use the command line to do the update. In the terminal, do the following.
- su - root
- Enter your root password
- yum upgrade -y
Install DNS
Now that the updates are done (however long that took), it's time to install the DNS server that Scalix needs. In the same terminal window (login in as root), do
- yum install -y bind caching-nameserver
/etc/hosts -- Edit this file
# Do not remove the following line, or various programs
# that require network functionality will fail.
127.0.0.1       localhost.localdomain   localhost
192.168.1.2     server.local.zzz server
The last line should use your IP address, and your FQDN and hostname.
/etc/resolv.conf -- Edit this file
search local.zzz
nameserver 192.168.1.2
/etc/named.conf -- Create this file
include "/etc/rndc.key";
zone "local.zzz" {
type master;
file "/etc/named.zzz.fwd";
allow-update { key "rndckey"; };
notify yes;
};

zone "1.168.192.in-addr.arpa" {
type master;
file "/etc/named.zzz.rev";
allow-update { key "rndckey"; };
notify yes;
};

options {
forwarders { 192.168.1.1; } ;
};
/etc/named.zzz.fwd -- Create this file
$TTL 14400;
@ 14400 IN SOA zimbra.localhost. root@zimbra. (
2009073001 ; Serial in YYYYMMDDXX- tab indented
28800 ; Refresh
3600 ; Retry
604800 ; Expire
14400 ; Default TTL
)
@ IN NS zimbra.localhost. ;
@ IN A 192.168.1.2
@ IN MX 10 zimbra
zimbra IN A 192.168.1.2
/etc/named.zzz.rev -- Create this file
$TTL 14400;
@ IN SOA zimbra.localhost. root.localhost. (
20090731001 ; Serial
28800 ; Refresh
3600 ; Retry
604800 ; Expire
38400 ; Default TTL
)
IN NS zimbra.localhost. ;tab intented
2 IN PTR zimbra.localhost. ;
2 IN PTR zimbra ;cd /
And, now for security, in a terminal as root, enter
- chmod 640 /etc/named.zzz*
- chmod 644 /etc/named.conf
- service named start
- chkconfig --level 2345 named on
A few things to remember. Be sure to enter your own info in the config files. This is just a sample you can modify for yourself. And, if you modify the forward or reverse zone files, you need to index the serial number. I chose a serial number of year, month, day, version. 2008011501. You can index numbers starting from 1. But with my format, it's easier to tell if you've actually changed the serial number.
Install Zimbra
Now, it's on to install Zimbra. First, we need to install a few packages before we do that. Once again, in a terminal, as root, enter:
- yum install -y compat-libstdc++-296 compat-libstdc++-33
- service sendmail stop
- chkconfig --level 12345 sendmail off
- cd /home/user/Desktop
- tar xvfz zcs-5.0.18_GA_3011.RHEL5.20090707164432.tgz
- cd zcs-5.0.18_GA_3011.RHEL5.20090707164432
- ./install.sh --platform-override
The installer will check to see what's installed. Being a fresh install, you'll have a series of NOT FOUND. At the end, press Return to continue
The installer checks for needed packages. If it finds everything it needs, it will then search for what's available to install (ie, what's in the extracted archive). Now it will ask you what to install, item by item.
Install zimbra-ldap [Y]                   --  Press Enter
Install zimbra-logger [Y]                 --  Press Enter
Install zimbra-mta [Y]                    --  Press Enter
Install zimbra-snmp [Y]                   --  Press Enter
Install zimbra-store [Y]                  --  Press Enter
Install zimbra-apache [Y]                 --  Press Enter
Install zimbra-spell [Y]                  --  Press Enter
Install zimbra-proxy [N]                  --  Press Enter

Checking required space for zimbra-core
checking space for zimbra-store

Installing:
zimbra-core
zimbra-ldap
zimbra-logger
zimbra-mta
zimbra-snmp
zimbra-store
zimbra-apache
zimbra-spell

Install anyway? [N]  -- Enter Y and press enter.  This answers the warning about CentOS

The system will be modified.  Continue? [N]  -- Enter Y and press Enter
Note:
I get a DNS warning message. You'll be asked if you want to reconfigure your domain name. Enter NO. Even though the installer warns of an incorrect MX record, it will not prevent mail retreival via POP or IMAP. If this were to be a 'real' mail exchanger, it would be an issue. I'm working on an alternative DNS config, and will post it when completed. This will, however, depend heavily on the configuration of DynDNS.
Several packages will now be installed. The next screen come up to configure Zimbra. The only thing that needs to be configured is the Administrator password. Enter 3, and 4. Enter the password. Enter R to return to the previous menu. Enter A to apply the settings. And Enter again to save the configuration data to a file. The default config file should suffice. Rename it if you like, or press Enter. Enter Yes to modify the system and finalize the install.
You'll be asked whether you want to notify Zimbra of your installation. Enter your desired response and press Enter.
A few more items will be setup. After it's finished, press return to exit.
Configuration
To access the configuration web page, go to https://[server]:7071. Login with admin@fqdn, and the password you setup.
Getting Your Email
Each user has the option of configuring external accounts. This is done through the Preferences, Accounts tab in the webmail interface. More information can be found in Zimbra's docs.
That's it! Enjoy your Zimbra email server!
No comments:
Post a Comment